| My Interests |
| Atari |
| Family Tree |
| Fonts |
| Gardening |
| Religion |
| Rock Climbing |
| Skating |
| Snow Boarding |
| Video Editing |
| Welcome |
| Quick Links |
| Blogs |
| Flickr Photos |
| Gmail |
| Logos |
| News Paper |
| OliveTree/Beta |
| Searching |
| Building a Quarter Pipe |
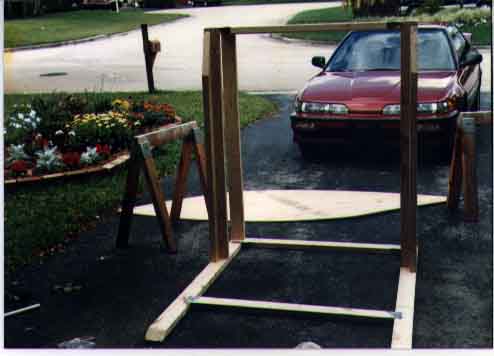
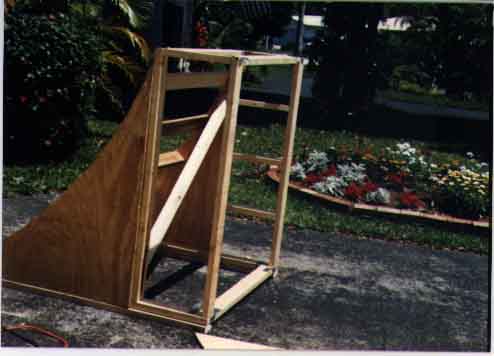
| This is the basic skeleton of the ramp. |
|
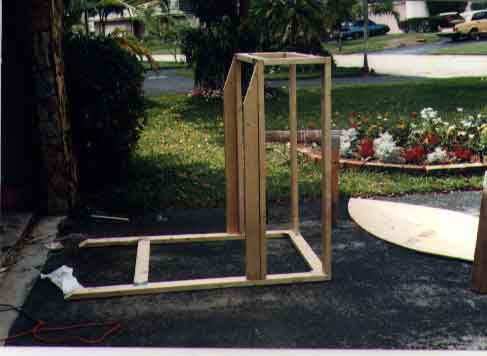
| Another view. All parts are put together with deck screws. |
|
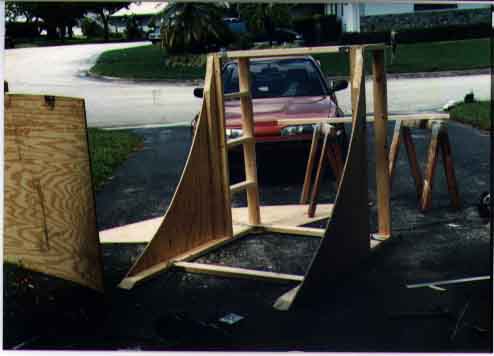
| Here the sides are attached. The radius is about 8 feet, but decreasing. I
used a 5 gallon paint bucket to do the decreasing radius. The intent was for it to be
fairly steep so that it simulated being near the top of a larger half pipe. I used 1/2 inch plywood for the sides. That seems to have been plenty strong. Note the built-in stairs on one side for climbing to the drop-in platform. |
|
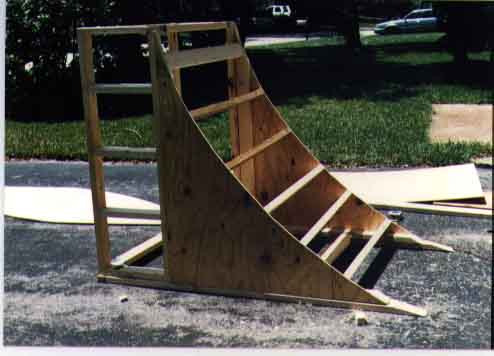
| The initial cut proved to be a little to steep where it meets the blacktop.
My brake would scrape going up or down. Not good. I added another 2x4 to the bottom to
stretch it out some more. This did the trick. Notice the ribbing. Except for the top one (where there wasn't room) its the edge that was exposed. I really should have put the ribs closer together near the bottom. That's where it gets the most stress. When you land near the top, you don't hit it hard. When you land at the bottom, you land hard. |
|
| Notice the diagonal support. Without that, it just isn't very stable. Use lots of screws to make doubly sure it is secure. Do one going the other way if your going to give it a lot of abuse. |
|
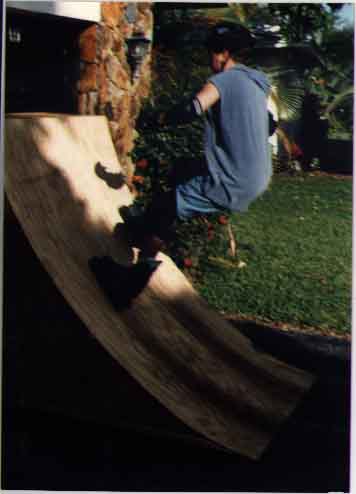
| The finished product. I used 3/8 inch plywood for the ramp surface. I soaked it in the swimming pool to get it to bend. Screw it down quickly, because when it drys, you won't get it to budge. I'm getting a little crack near the bottom. I should have put more ribs in down there. I'll probably remedy the situation by adding another 3/8 inch layer. |
|

